Wednesday, August 24, 2011

Ti Chronos ez430

Yesterday I received my Chronos sport swatch from Ti. I saw a post on HackaDay about Tideals.com. At half off of the original price, I just couldn't pass up ordering a new gadget to play with. After doing some research before I ordered it, I ended up getting the Ti LaunchPad for $4.30 as well. A MSP430 dev board. For the price, why not? Plus both included shipping.

Here is the LaunchPad:


And the Chronos:

Now just to figure out want to do with them. I started messing with the Chronos last night and it defiantly isn't as easy to get started as the Arduino but I am sure I will get comfortable with it after some time.

I was thinking since I will be flying next week, my first project would be data logging pressure changes during a flight. As it turns out, I can do it with the included software.

Once I get some time I will have to try the "hello world" to get started and familiar with the tools and processes.

So far, I haven't found any sites that provide help with getting started right out of the box and uploading your first code. I want to add some basic stuff while keeping the original in tact. I have my workspace started with the stock code so far. Time to do some dissecting....

If anyone knows of some good sites post them in the comments.

Off to do some coding!

Week of 08/14/2011 & 08/21/2011 - Motor Stuff

On a mission to solve this motor problem I was up late one night doing research. After some calculations and research of different motors I ended up ordering a few.


The difficult thing was finding a motor that was the same size and low power requirements but having more torque than what I had.

Fast forward to this week of 08/22/2011 and my motors have finally arrived. I spent the evening swapping the front two motors and testing the results before I replaced the other two. To my disappointment they seemed weaker than the originals. 

The next day, I decided to put the originals back in. Wow! Such a pain to end up at square one. I ended up breaking 2 tabs, one on each motor. It was frustrating. But as a result, I will be posting a tutorial of how to fix these motors when the tabs break. I was about to put everything away and deal with it another day but after some investigating I figured out a way to fix the motor and make it usable. Should be posting that within the next week or so.

So now it is back to the drawing board to solve my under torque issues. I have some ideas as how to proceed but I might just skip ahead to my custom PCB phase instead. 

  1. I need to do some tests to see if maybe my motors just don't have enough current available.
  2. I could design a custom motor controller with separate power inputs and higher current limits.
  3. I am thinking to look into modifying the current motor controller to allow for separate logic and motor power inputs.

Two and three allow me to remove the step-up convert which would be nice plus better power efficiency.

But after all this, I'm thinking it might be better to skip ahead, go with the next phase and design a custom PCB that includes all parts. 

This would be a PCB with motor controller, Arduino Mega and other shields all in one. Plus a nice signal connector for all sensors. 

Also, this would be my first PCB design and I am looking forward to it; but it would delay a working robot for awhile, at least. 

If anyone has some ideas or can help please drop a comment below. This is really my last problem and the rest is all coding. 

Here is the current thread with more details.


This week I have been out sick and I will be flying to my cousin's wedding next week. Other than my tutorial you won't see any posts until September but I'll still keep in touch via the comments. 


Tuesday, August 16, 2011

Week of 08/07/2011 - Motor Problems and Other Projects

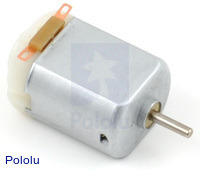
Another week has gone by without making much progress on the SBot project. My primary problem has been getting it to turn reliably. There is seemingly insufficient torque to turn with the weight even with 4 DC motors, but they are wired in parallel in sets of 2. Using the bathroom scale, my robot weighed in at a reasonable 3.8 pounds. There are ways I can turn over a distance but not within a small space which is needed for docking. After some research and posting online, it doesn't seem that my problem is power related even though the LCD does dim when the motors start moving. Disconnecting the LCD doesn't seem to make a difference, so I really need stronger motors.

Last week after having coming to my conclusion about needing stronger motors, I decided to finish some other things on my to do list. One of them being to rebuild my Asterisk PBX. Originally it was a VBox VM running on my computer which was used mainly for free calls via Google Voice. This time I wanted to run it on my VMWare ESXi server using the updated Google Voice calling script. I also decided that I wanted to have a cleaner reliable install to be able to use for more than just myself.

Unfortunately, my VM server can only have 4GB's of RAM but I am no longer running my own email server and therefore have freed up resources to play with. I recently migrated to Google Apps after running my own email server since 1999. It wasn't an easy choice but now it's hands free email.

Using Incredible PBX from Nerd Vittles I rebuilt the PBX from scratch. The nice thing about this build over previous versions is that you don't need an incoming DID. The PBX can connect directly to Google Voice thanks to the Google Talk gateway.

For the most part everything is working and I already have a few extensions running.  Originally I was going to have incoming and outgoing via the PBX on my phone but it really does affect the battery. So I have my Android phone setup to use Internet Calling as an option when placing a call. I also setup my girlfriends' iPad with an extension which works well. It's kind of cool to be able to make calls on the iPad that are completely free.

Overall, I am not sure how practical this will be as a lot of calls I make are free anyway and I usually don't have any problems with enough minutes. Either way there is still the cool factor and a good conversation starter for your geeky friends. Oh and yeah, it's also a very good learning experience.

If you want to try it head over to http://nerdvittles.com/?p=740 and give it a shot. One thing to note is I am using the same Google Voice account as my cell phone since I wanted to retain my routing and people can call my cell causing it to fall back to my PBX if I don't answer. I am still using Google for my voice mail but you could use the PBX. So far I haven't had any problems as mentioned in the guide.

If you have any questions about my setup or getting yours going, free feel to comment and I can try to help.

Have fun making free calls! Don't we all love the internet?


Wednesday, August 3, 2011

Robot Control Web Site

Since SBot 1, I have been working on a web site to control my robot. This way any platform can control it as long as it has a browser. Eventually I may create specific apps for Android/iPhone just for the experience of mobile app development as I have not had the opportunity.


I recently added forms based authencation. Before it would prompt for login. The back end uses Active Directory.
 This is the control site for SBot 1. You can see a tab for JBot1. That is an implementation I setup to use java to refresh the images so they are smoother but doesn't work for mobile.
Control site for Sbot 2 which doesn't have all the controls yet.


I started with the simple ASP.Net example in Visual Studio 2010 and went from there.

The video is shown using an application called Active WebCam from PY Software which is running on my computer. I have two A/V receivers connected to my computer via two USB capture devices. The images are then saved to my web server. I will post some pictures of the receivers soon.

Let me know want you think. Any ideas or improvements would be greatly appreciated!

Week of 07/24/2011 and 07/31/2011

Even though this week isn't over, I still wanted to post my current progress since during the week of July 17, most of my time was spent packing for Comic-Con in San Diego. It was an awesome trip and I will probably post pictures soon. I wasn't able to blog about it or my robot again last week because with travelling, plus that many people at the Con, and lack of sleep, illness struck so I was out sick most of the week.

So far, this week, I was able to make some progress. Me and my girlfriend have started a schedule to get us back into a weeknight routine so that we can work on projects and other to-do's that get set aside.

Last night I decided to work on the website and add video camera control buttons. After a lot of research I was able to add buttons that increment the angle. The thing that made it difficult was to retain the current position during each HTTP post. I ended up using Session State to store the values. This sets the framework for storage other variables for other functionally. In the future I may use Application State so that if more than one user is using it or I come back to the camera it won't jump and instead it will continue where it left off. I will post some pictures of the site so far in another post.

The rest of the week and probably next week as well, I will be adding more commands to the site so that I can start testing remote control from work.

Security Bot 2 Completed Pictures

After my project was posted on Hack A Day I realized I don't have pictures of the completed build. Of course it goes it without saying that it is really never completed. Who knows what we will be added in the next year or two?


 Sensor ouput on LCD

Right: distance sensors and brightness across the bottom.

Left: camera angles and battery levels.

Bottom: temperature and humidity followed but the last spoken text.
View from the rear which includes the IR switches on the left and right.

At the bottom is the DC jack that is connected to the charging rails underneath.

The PCB from top to bottom,

Xbee, Voice, Proto, Mega
Left: shows the microcontroller battery and step-up.
Charging dock using copper straps from the hardware store. Currently temporarily attached.
Bottom of the robot showing the copper charging straps.